How to Convert a Chlorine Pool to Saltwater: Complete Guide with Costs
Converting a chlorine pool to saltwater costs $550-$2,650 for the salt chlorine generator (SWG) and initial salt, or $700-$2,950 if professionally installed. Most homeowners complete the physical installation in 3-6 hours. If you’re comfortable cutting PVC pipe and basic electrical work, this is a manageable DIY project. If not, pool service companies typically charge $150-$300 for the installation. We walk you through pre-conversion checks, sizing the SWG, the installation steps, and the critical first two weeks of chemistry adjustment. For ongoing care after conversion, see our saltwater pool maintenance guide.
How Much Does Saltwater Conversion Cost?
Most readers want this answer first, so here it is. The table below breaks down the full cost picture for DIY vs. professional installation.
| Item | DIY Cost | Professional Cost |
|---|---|---|
| Salt chlorine generator (unit + cell) | $500-$2,500 | $500-$2,500 |
| Installation labor | $0 | $150-$300 |
| Initial salt (50-100 lbs) | $50-$150 | $50-$150 |
| Equipment upgrades (if needed) | Variable | Variable |
| Total first year | $550-$2,650 | $700-$2,950 |
Annual ongoing cost after conversion: $110-$230 per year (vs. $300-$600 for a chlorine pool). That’s a savings of $150-$400 per year once the system is running, which means most pools break even on the investment in year 4-6. For the full 10-year cost comparison, see our saltwater vs chlorine pool true cost comparison.
Converting a chlorine pool to saltwater costs $550-$2,650 for the equipment and initial salt, or $700-$2,950 if professionally installed. Most pools break even on the investment in year 4-6 through annual chemical savings of $150-$400.
Before you convert: pre-conversion checklist
Before purchasing equipment, take 30 minutes to check your existing pool for compatibility issues. Discovering a problem after the SWG arrives costs more time and money to fix.
Check equipment compatibility:
- Pool pump: All modern pumps are compatible. Older pumps with cast iron or aluminum internal components may corrode faster in a salt environment, check your model.
- Filter: Sand, cartridge, and DE filters all work fine with saltwater systems. No changes needed.
- Pool heater: Most modern heaters have titanium or cupronickel heat exchangers rated for saltwater. Check your owner’s manual for a “saltwater compatible” specification. If it’s not listed, call the manufacturer.
- Light fixtures: Stainless steel or plastic fixtures are fine. Chrome or brass fixtures may corrode over time.
Check plumbing:
- Galvanized steel pipes: Incompatible with saltwater. Must be replaced before conversion, concentrated saltwater will corrode galvanized fittings quickly.
- PVC, CPVC, copper: All compatible with saltwater. Copper may show minor staining at salt levels above 4,000 ppm, but at the standard 3,200 ppm target, staining is rare.
Check chemistry before you start:
Understand your pool water chemistry fundamentals baseline before adding equipment. If you’ve been using Tri-Chlor tablets, your CYA may already be at 60-90 ppm, which is exactly where you want it for a salt pool. Test CYA before adding any stabilizer post-conversion.
Resolve any existing chemistry issues or algae problems before installing the SWG. Installing into a problem pool is a common and avoidable mistake.
Size your SWG correctly:
Choose a salt chlorine generator rated for 1.5x your actual pool volume. A 20,000-gallon pool benefits from an SWG rated for 30,000 gallons. The larger capacity means the unit runs at a lower output percentage during normal operation, which extends cell life and gives you headroom for peak summer demand.
When sizing a salt chlorine generator, choose a unit rated for 1.5x your actual pool volume. A 20,000-gallon pool benefits from an SWG rated for 30,000 gallons, the larger capacity means longer cell life and headroom for peak summer demand.
Choosing the right salt chlorine generator
The SWG market is dominated by three reliable brands in the $500-$2,500 range:
- Hayward AquaRite: Most widely installed in the US, well-supported, built-in 500-hour inspection reminder. Review the Hayward AquaRite salt system overview{:target=“_blank”} for current models and sizing.
- Pentair IntelliChlor: Strong integration with Pentair automation systems, “Cell Low” indicator for real-time output monitoring. See Pentair IntelliChlor specifications{:target=“_blank”} for full spec sheet.
- Jandy AquaPure: Good build quality, though it requires a separate test kit to verify actual chlorine output (no display indicator).
Key features worth paying for: self-cleaning (reverses polarity to loosen scale automatically) and Wi-Fi monitoring (lets you adjust output from your phone). Both features extend cell life and reduce maintenance time.
For a full model comparison, see our guide on choosing the right salt chlorine generator.

Step-by-step saltwater conversion
Video guide
Video: “How To Install a Salt Pool System” by Discount Salt Pool
What you’ll need:
- Salt chlorine generator kit (controller + cell)
- Schedule 40 PVC pipe and fittings (matched to existing plumbing diameter)
- PVC primer and cement
- Union fittings (two, one on each side of the cell for tool-free removal)
- Teflon tape
- Electrical wire (gauge per controller manual, typically 12 AWG for 120V or 10 AWG for 240V)
- Pool-grade NaCl salt at 99.8% purity (quantity based on pool volume)
Step 1: Plan the installation location
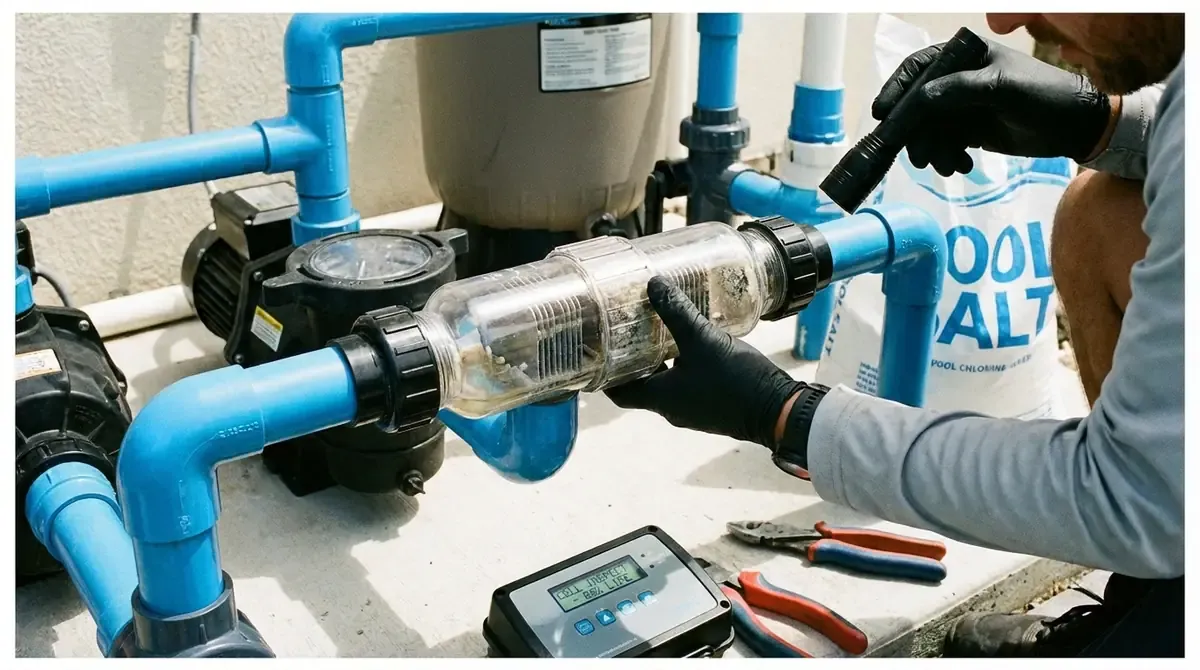
Install the cell in-line on the return line, after the filter and heater. Installing before the heater exposes the cell to heat stress, which degrades the membrane faster. Mount the controller near the equipment pad, away from water spray. Allow at least 6 inches of straight pipe on each side of the cell to reduce turbulence and improve flow readings.
Install the SWG cell on the return line after the filter and heater, not before. Heat degrades cell membranes faster when cells are installed upstream.
Step 2: Cut and prepare the return line
Turn off the pump and close all valves. Cut the return line at the chosen location. Install union fittings on both sides of the cut, these make future cell removal tool-free, which matters when cleaning time comes every 30-90 days.
Prime and cement all PVC connections. Allow at least 30 minutes before testing pressure, and 2 hours before full water flow.
Step 3: Mount and wire the controller
Mount the controller within 6 feet of the cell (most cable runs are this length). Connect the cell cable to the controller.
The controller requires connection to your timer or sub-panel. 120V or 240V depending on the unit. Follow local electrical code for conduit and breaker sizing.
Step 4: Add pool-grade salt
Calculate how much salt you need. Starting from zero, a 10,000-gallon pool requires approximately 267 lbs of salt to reach the 3,200 ppm target. Use the formula: (pool gallons ÷ 10,000) × 267 lbs.
Pour bags of pool-grade NaCl directly into the pool at the deep end.
Pool-grade sodium chloride at 99.8% purity is the only safe choice. Table salt, rock salt, and ice melt all contain additives that damage cell plates.
Step 5: Test and start the SWG
After the 24-hour dissolution period, test salt level with test strips or a digital meter (the SWG display reading can be off by ±200-300 ppm until calibrated). Target: 2,700-3,400 ppm with 3,200 ppm as the ideal.
Start the SWG at 50% output. Test free chlorine after 24-48 hours and adjust output percentage to maintain 2-4 ppm FC. Within 48 hours, begin monitoring pH, it will start rising immediately.
Post-conversion: first two weeks
The first two weeks after converting are the most important for dialing in your new system. Most new saltwater pool owners are unprepared for the chemistry shifts that happen in this period.
Week 1 priorities:
- pH: Will rise 0.2-0.4 per week with the SWG running. This is normal and ongoing, not a malfunction. Test daily and add muriatic acid to bring pH back to 7.4-7.6. For muriatic acid dosing, see our guide on using muriatic acid to control pH.
- CYA: If switching from Tri-Chlor tablets, CYA may already be at 60-90 ppm. Test before adding any stabilizer. If you were adding liquid chlorine only and CYA is near zero, add cyanuric acid to reach 70-80 ppm before heavy sun exposure.
- FC calibration: Run SWG at 50%; test daily and increase output percentage as needed to hold 2-4 ppm FC.
- Salt recheck: Test at day 7 and day 14 to confirm proper dissolution and correct any reading drift.
For the full chemistry target ranges and ongoing adjustment schedule, see our guide on first chemistry adjustments for your new salt pool.
Common saltwater conversion mistakes
We see these mistakes consistently. They range from minor setbacks to expensive repair bills.
- Running SWG before salt fully dissolves: Triggers a “low salt” error, stresses the cell, and can cause inaccurate reading calibration. Always wait the full 24 hours.
- Not oversizing the SWG: A unit running at 100% output constantly has a much shorter cell life than one running at 60-70%. Size up by 1.5x.
- Skipping the compatibility check: Installing before checking copper or galvanized plumbing means corrosion starts on day one.
- Using table salt or ice melt: Additives in non-pool-grade salt damage cell plates and cloud pool water. Only 99.8% pool-grade NaCl is safe.
- Adding salt through the skimmer: Concentrated salt damages the skimmer basket. Always pour into the pool directly.
- Ignoring pH in week 1: pH above 7.8 dramatically reduces chlorine effectiveness. The SWG may be producing adequate chlorine that’s chemically inactive because of high pH.
Saltwater conversion FAQ
Can I convert an above-ground pool to saltwater?
Yes. Above-ground pools convert to saltwater with the same process and equipment. Choose a self-cleaning SWG rated for your pool volume (oversized by 1.5x). Check that any metal components, ladders, frames, steps, are stainless steel, not aluminum. Aluminum corrodes rapidly in saltwater environments.
Do I need an electrician for the installation?
The SWG controller requires connection to a timer or sub-panel. If you’re comfortable with residential electrical work, this is straightforward. If not, hire a licensed electrician for the wiring, it typically takes 1-2 hours and costs $75-$200. The plumbing installation is the easier half and fully DIY-friendly.
How long does the conversion take?
The physical installation takes 3-6 hours for most DIYers. Allow 24 hours for salt to dissolve before starting the SWG, then 48 hours of operation before chemistry is fully dialed in. Total process from installation day to stable chemistry: 3-4 days.
What do I do with leftover chlorine tablets?
Store them in a sealed, cool, dry location for occasional use or pool opening. You may want liquid chlorine on hand for shocking purposes, which the SWG cannot handle alone. For guidance on the TroubleFreePool chemistry approach after converting, see the TroubleFreePool post-conversion chemistry guide{:target=“_blank”}.
Can I revert back to chlorine if I don’t like saltwater?
Yes. Turn off and remove the SWG, partially drain and refill the pool to dilute the salt (salt cannot be chemically removed, dilution is the only option), then resume manual chlorine dosing. The salt level must drop below 1,000 ppm for standard chlorine pools to function normally. Full reversal typically requires draining 50-75% of the pool volume.